
Signals are a state management primitive that has been taking over the web in the last year. Multiple Javascript frameworks have authored their own signals implementation to manage fine-grained reactivity. One of the popular implementation came from the Preact team in the form of @preact/signals. This implementation was built with a focus on Preact, but also provides a React adapter that allows React application to use signals with the same api.
Since the Preact team are behind the library, they added first party support to the Preact developer tools extension, but nothing was built for React users to inspect their signals state easily. This is a perfect use-case for Aside and that's what we'll build today!
You can preview the final result here.
If you aren't familiar with signals, I highly recommend reading through the following articles:
Getting started
If you already have a React app using signals, you can skip to this section.
1. Create a React app
Let's start by creating a new React app using Vite's React and Typescript template.
yarn create vite signals-react --template react-ts
2. Install signals
For this example, we will be using signals-react-safe a wrapper over Preact signals that does not patch React's internals.
None of the following implementation relies on features of signals-react-safe. If you prefer using the core signals package or the official React transform, this tutorial will be relevant.
- npm
- pnpm
npm install signals-react-safe
pnpm add signals-react-safe
3. Create signals
Let's create two signals:
- A primitive signal
counterthat represents a number. - A computed signal
counterSquaredthat is derived fromcounter.
import {signal, computed} from 'signals-react-safe';

export const counter = signal(0);
export const counterSquared = computed(() => counter.value ** 2);
import {useSignalValue} from 'signals-react-safe';
import {counter, counterSquared} from './signals';

function App() {
  const counterValue = useSignalValue(counter);
  const counterSquaredValue = useSignalValue(counterSquared);

  return (
    <>
      {/* ... */}
      <button onClick={() => counter.value++}>
        count is {counterValue} (Squared is {counterSquaredValue})
      </button>
    </>
  );
}
4. Install Aside's packages
Now that we have a tiny app consuming signals, we'll integrate it with Aside's devtools.
Let's install aside's main packages and @aside/activity to leverage the activity components.
- npm
- pnpm
npm install @aside/react, @aside/chrome-ui-remote, @aside/activity
pnpm add @aside/react, @aside/chrome-ui-remote, @aside/activity
5. Create a Devtools component
import {
  ActivityStoreDescriptor,
  ActivityProvider,
  Activity,
  ActivityDetails,
  ActivityView,
  useMonitor,
} from '@aside/activity';
import {
  Pane,
  Tabs,
  PaneToolbar,
  TabsList,
  TabsTrigger,
  TabsContent,
} from '@aside/chrome-ui-remote';
import {
  Aside,
  Devtools as AsideDevtools,
  useLocalStorageState,
} from '@aside/react';
import React, {useMemo} from 'react';
import {useComputedValue} from 'signals-react-safe';
import {counter, counterSquared} from './signals';

export function Devtools() {
  // Compose all signals into a single object
  const signals = useComputedValue(() => ({
    counter: counter.value,
    counterSquared: counterSquared.value,
  }));

  // Create a monitor with all signals to track past states
  const signalsMonitor = useMonitor(signals, [signals]);

  // Create an activity store to customize how to display your signal state
  const appActivity: ActivityStoreDescriptor[] = useMemo(
    () => [
      {
        type: 'signals',
        displayName: 'Signals',
        monitor: signalsMonitor,
        icon: 'https://graphql.org/img/logo.svg',
      },
    ],
    [signalsMonitor],
  );

  // Render the aside devtools remote with the activity provider
  return (
    <Aside>
      <AsideDevtools>
        <ActivityProvider activity={appActivity}>
          <AsideApp />
        </ActivityProvider>
      </AsideDevtools>
    </Aside>
  );
}

// Build the interface rendering in the devtools panel.
function AsideApp() {
  const [tab, setTab] = useLocalStorageState('activity', {
    key: 'tab',
  });

  if (tab.loading) return null;

  return (
    <Pane>
      <Tabs defaultValue={tab.data} onValueChange={setTab}>
        <PaneToolbar>
          <TabsList>
            <TabsTrigger value="activity">Activity</TabsTrigger>
            <TabsTrigger value="signals">Signals</TabsTrigger>
          </TabsList>
        </PaneToolbar>

        <TabsContent value="activity">
          <Activity>
            <ActivityDetails type="signals" />
          </Activity>
        </TabsContent>
        <TabsContent value="signals">
          <ActivityView type="signals" />
        </TabsContent>
      </Tabs>
    </Pane>
  );
}
6. Render the devtools component in your app
Currently, Aside does not work well with React's strict mode. If you are using strict mode, you will need to disable it for the devtools to work.
import {Devtools} from './Devtools';

function App() {
  return (
    <>
      {/* ... */}
      <Devtools />
    </>
  );
}
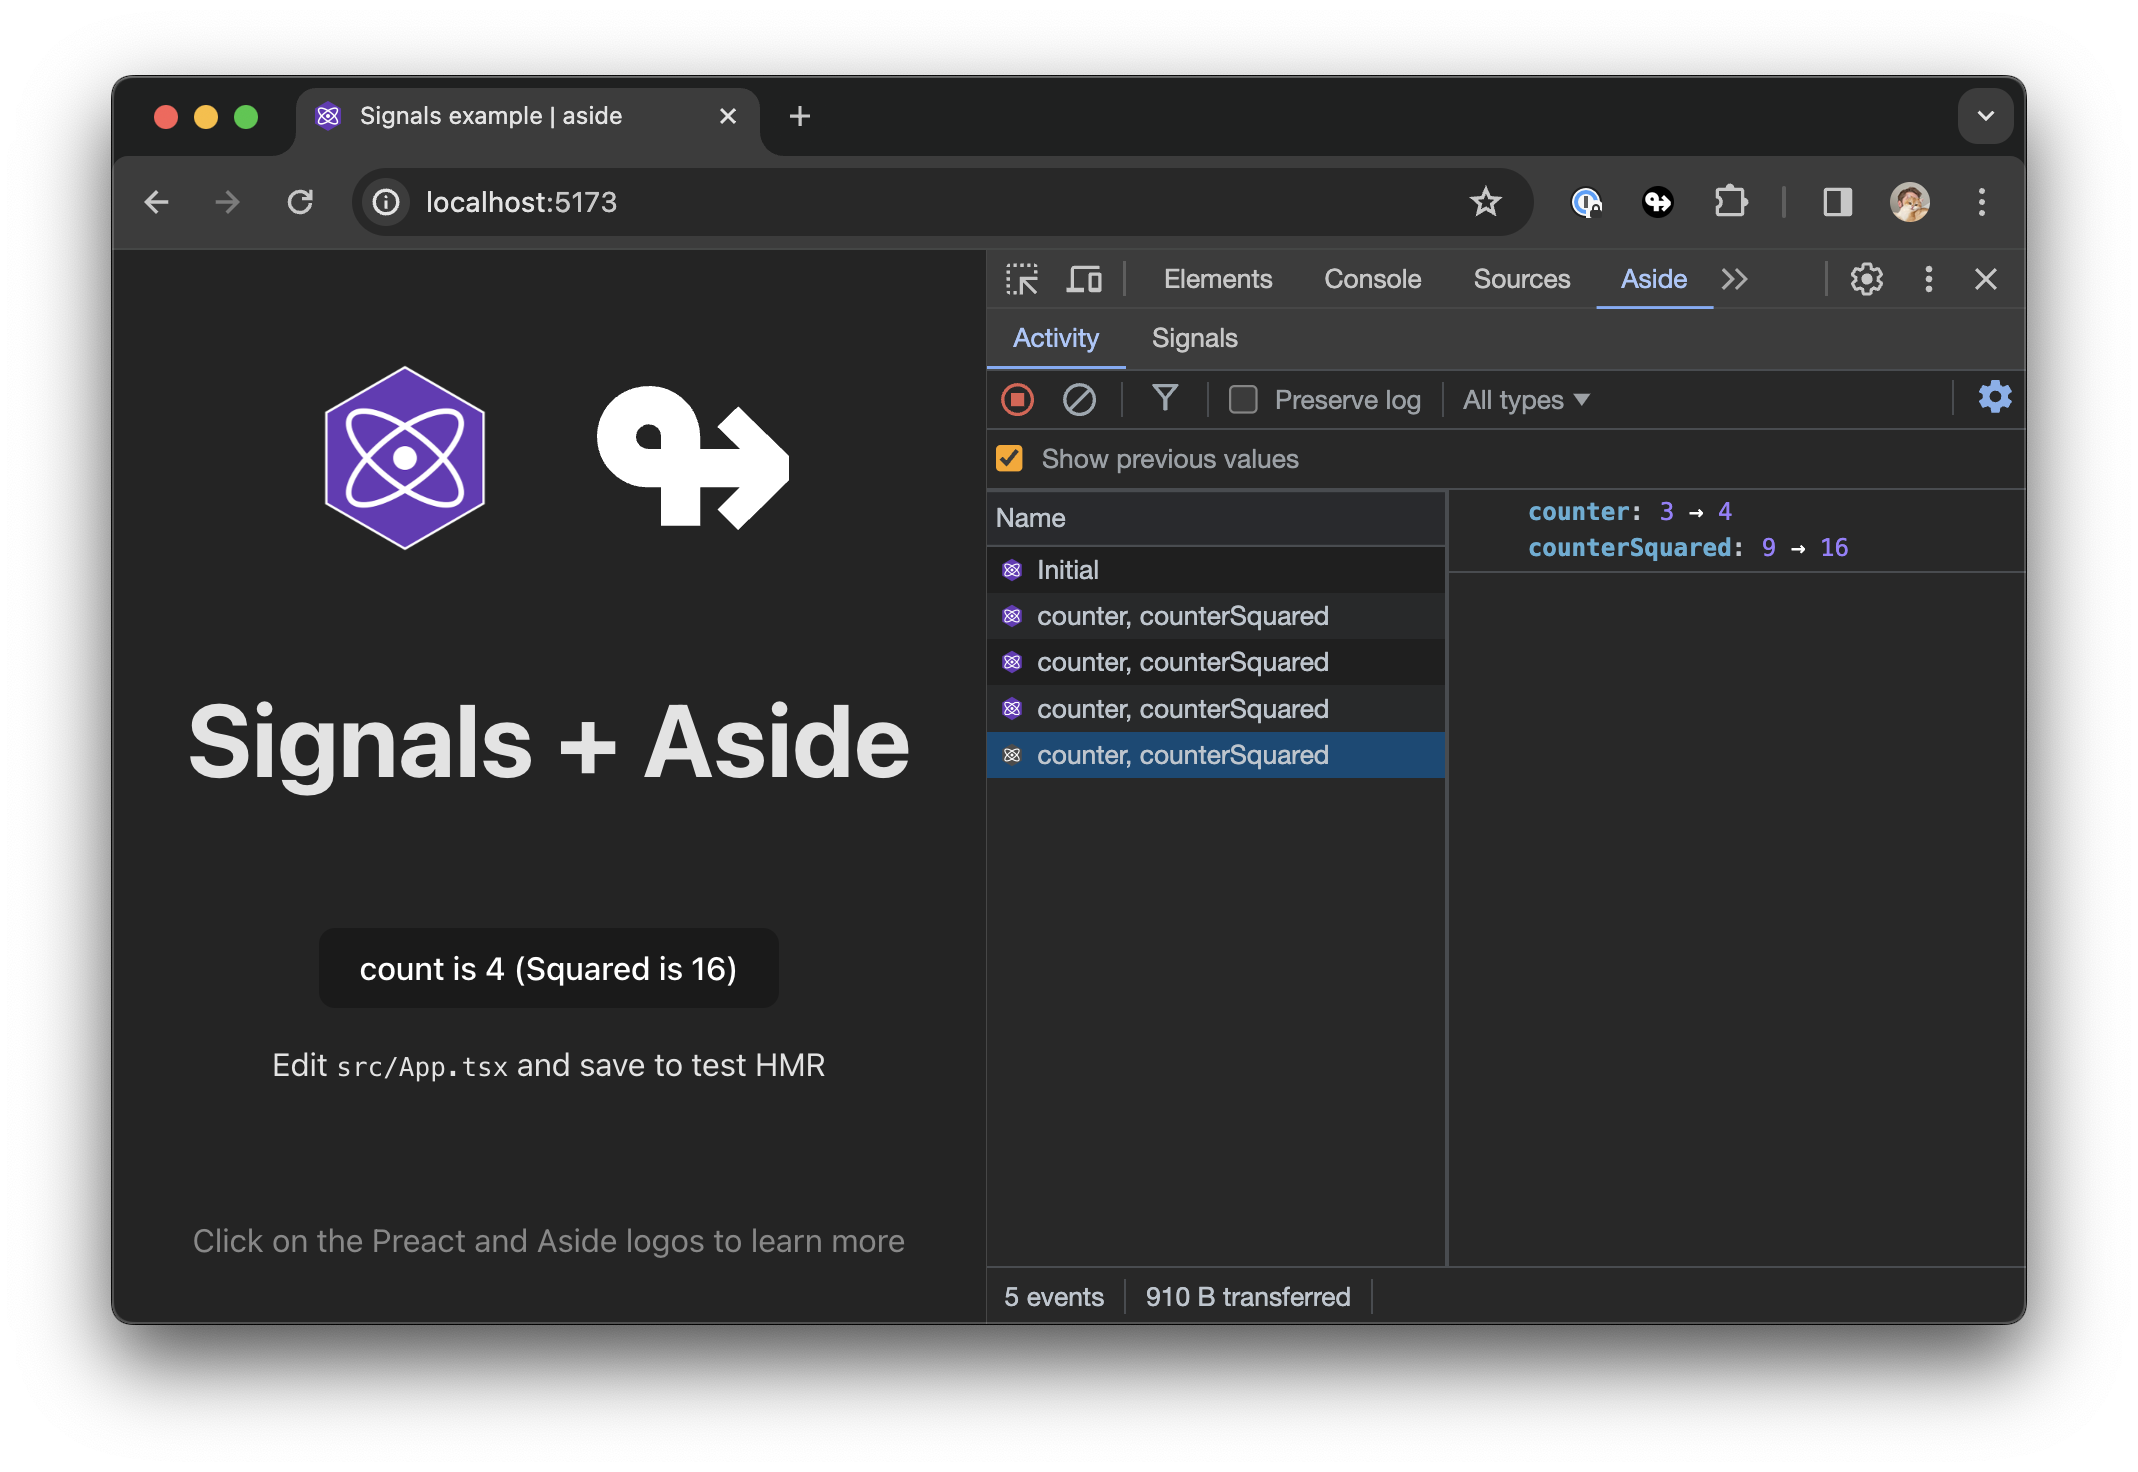
That's it! You have now the activity tab tracking state changes of your signals and the signals tab to see the current state.
What's next ?
This example is a very basic implementation of what you can do with signals and aside. The real power of Aside comes from the ability of combining data sources from your application and easily composing UI.
Read more about the activity feature to implement additional data stores here.